

Bromic Heating is a global distributor and manufactural company based in Sydney, Australia. They specialize in three major product lines, which are refrigerators, plumbing, and heating. There are many brands of patio heaters on the market. This article focuses explicitly on the Bromic Heater.
A patio heater is an appliance that generates heat for outdoor use. It has a burner at the top of a pole that burns fuel and directs the flames towards a perforated metal screen. The burner uses liquefied natural gas (LNG), propane, or butane. The metal screen then reflects heat for warmth.
By nature, generated heat travels upwards, but this is not what you want with a patio heater. The reflecting hood prevents the heat from escaping upwards; it is usually covered in silver. Although silver is a poor absorber of heat, it does an excellent job at reflecting it.

Over the years, there has been a significant demand for outdoor heating systems. With their various types of patio heaters, Bromic heaters have played a major part in meeting this demand.
This Bromic Heaters Guide covers topics related to Bromic heaters such as troubleshooting, installation, fuel types, and appliance types.
Why Outdoor Heating?
One might ask, “why bother heating the outside when you can just go inside?” Of course, we are most familiar with indoor heating. But, people like to be outside, they enjoy the fresh air and the views during dates, barbecues parties and so on. But to enjoy all that without the cold, they need an outdoor heating system, such as a Bromic heater.
Also, restaurant and bar owners sometimes have a lot of outdoor activities and seating areas. Having an outdoor heating system can help grow their business. In the warmer months, restaurants and bars benefit financially from indoor and outdoor seating. But in the colder months, without adequate outdoor heating, they can only benefit from indoor occupancy.
How Does Outdoor Heating Work (Bromic Heater)?

The indoor is an insulated area, with walls and objects like couches and beds. These objects help trap in heat generated by the furnace indoors. A thermostat controls the furnace. When it gets too hot, the thermostat turns the furnace off and turns it on when it gets too cold.
There is no object to trap in the heat for outdoor heating because it is not an insulated area. The Bromic heater targets objects (metal and wood) like chairs and tables. Because the goal is to heat things and not the air, Bromic Heaters are wind resistant. They can still keep people warm even in relatively windy conditions.
Types of Bromic Heaters
When it comes to types of the Bromic heater, there are two major types and about 24 appliances in the outdoor heating product line.
Platinum Smart-Heat
The Bromic Platinum Smart-Heat consists of the major types: Platinum Smart – Heat gas and Platinum Smart-Heat electric. Below are the features of these models.
Platinum Smart-Heat Gas

Pros:
- Tinted Glass-Ceramic Fascia – The ceramic glass enables the heater to spreads comforting heat evenly across a large coverage area.
- Beautiful Design – Because of its stylish design, it beautifully blends into any background.
- Flexible Mounting – Can be mounted either on the ceiling or the wall.
- Multiple wireless control options – The unit is compatible with a lot of wireless control options.
- Easy To Use – Because of its compatibility and automated re-ignition, the Platinum Smart-Heat Gas is easy to use because it allows users to set and forget.
- Multiple fuel types – It has natural gas and propane power models.
Cons:
- Expensive – Because the model is one of the top-ranged models, it is expensive.
- Limited Range – It can only be used outdoors.
- Fixed Position – The mounted position may not always be suitable for changeable seating arrangements because it is stationary.
The Bromic Platinum 300 Smart-Heat Gas 3 Burner Radiant Infrared Patio Heater for Natural Gas provides 23,600 BTU/hour of direct people-warming heat. It heats up fast and keeps you warm so you can enjoy your backyard grill and outdoor living spaces into the night and all year-round.
Platinum Smart-Heat Electric

Pros:
- Tinted Glass-Ceramic Screen – This model is equipped to distribute heat evenly.
- Environmental Efficiency – The ceramic technology allows heat to be distributed evenly while minimizing power.
- Uniquely Designed – This model can blend effortlessly into any background because of its elegant design.
- Wireless Control Capabilities – You can control The Platinum Smart-Heat electric remotely. Thus, there is no need to visit the device to ignite constantly.
- Ultimate Wind Resistance – Innovative patented technology enables a very high wind resistance. It speeds up to 11mph.
- Flexible Mounting and Direction Control – The heater has ceiling and wall mounting options. With a custom pivot bracket, you can adjust the heat direction and coverage.
Cons:
- Expensive – Buying this model can be costly as well as operating it.
- Fixed Location – Because this model is stationary, the mounted position may not always be suitable for changeable seating arrangements.
- High Energy Consumption – It consumes a lot of electricity
- Needs Electrician – Required a licensed electrician to inspect and repair.
Comfortably warm your friends or patrons with the 33-inch wide Bromic Platinum Smart-Heat 2300W Electric Outdoor Heater.
Tungsten Smart-Heat
Here are some features of the tungsten Smart-Heat model:
Tungsten Smart-Heat Gas

Pros:
- High-Performance Mesh Screen – The honeycomb mesh screen optimizes performance. It contributes to the efficient distribution of heat.
- Environmental Efficiency – The ceramic technology allows heat to be distributed evenly.
- Direct Ignition System – This patio heater does not need the pilot light to ignite.
- Wind Resistance – It has reliable wind resistance. The patented technology provides reliable function wind and speeds up to 8mph.
- Versatile Mounting – With the necessary tools need and mounting options, the Bromic tungsten gas heater can be mouthed either on the wall or on the ceiling.
Cons:
- Needs Professional Installation – The Tungsten Smart-Heat gas installation can be very complicated as some appliance parts come unattached.
- Dependent on Gas Lines – It needs to be constantly connected to gas lines to work.
- Needs Ventilation – For safety, the Bromic gas patio heater occasionally requires ventilation.
- Expensive
The Bromic Tungsten 300 Smart-Heat Gas 3 Burner Radiant Infrared Patio Heater for Natural Gas provides 26, 000 BTU/hour of direct people-warming heat. It heats up fast and keeps you warm so you can enjoy your backyard grill and outdoor living spaces.
Tungsten Smart-Heat Portable Propane

The tungsten Smart-Heat portable is a very powerful heater. Wide-spread heat output of 13ft wide and 16ft deep provides about 215 square feet of heat. Below are the pros and cons of this model.
Pros:
- Portable – Powerful yet easy to move to any location of your choice.
- Beautiful Design – The Tungsten Smart-Heat portable heater has a stylish design.
- Efficient Heating Performance
- Less Expensive – Because it’s powered by propane, it is less expensive to operate.
Cons:
- Sensitive to the Wind – Unlike the electric model, the burners can be blown out by the wind. Less wind resistance than the electric model.
- Refilling – The tanks need to be refilled.
- Heavy maintenance – Requires constant cleaning and inspection to make sure nothing is blocking the burner, orifice, or burner screen.
Bromic Heating leads the market in supplying your outdoor patio with radiant heaters that demonstrate outstanding performance and unbeatable quality. 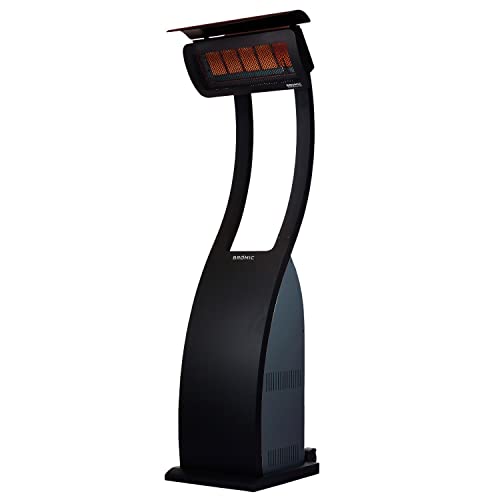
Tungsten Smart-Heat Electric

Pros:
- High-Performance Mesh Screen – There is not much difference between the Tungsten Smart-Heat gas and the Tungsten Smart-Heat electric. Just like the gas series, the Tungsten Smart – Heater also has a high-performing mesh screen.
- Ultra-Durable Design – The stainless-steel construction contributes to the heater’s reliable heating performance and durability due to its corrosion resistance.
- Wireless Control Capabilities – The Tungsten Smart-Heat electricity can be controlled remotely. Thus, there is no need to visit the device constantly for ignition.
- Directional Heating – Heat can be easily directed to the desired area. You can change the heat coverage with a simple adjustment of the bracket.
- Ultra-Durable Quartz Element: The model has a durable and thick steel coil in translucent quartz glass, which provides high thermal performance.
- Easy to install – Installation is as simple as mounting the appliance and connecting to power.
Cons:
- Very Expensive – The tungsten Smart-Heat electric is a top-range model so that it can be more expensive than an average patio heater. The price ranges from $500 upwards.
- Less Heat – It generates less heat than the propane model.
- Requires Electricity – It needs access to the power outlet to work as a power source.
Bromic outdoor heaters are recognized all over the world for superior design and performance. From luxury hotels and leading restaurants to distinguished outdoor kitchens and exquisite backyards, Bromic outdoor heaters deliver the perfect balance of performance, reliability, and beauty.
How to Install Bromic Heaters
Gas Models – Platinum and Tungsten Smart-Heat
By now, you can tell that not all Bromic heaters require installation, like the tungsten portable and standing heaters. However, the Bromic Platinum and Tungsten Smart-Heat heaters require installation, and below are the instructions on installing the gas models.
Things to Know Before Beginning Installation
Here are some quick pointers:
- Do not mount the heater vertically.
- The heater must be installed in a way that the tube elements are horizontal. That way, the heating element within the tube will not sag and cause premature burnout.
- The heater must be mounted with the face angled down to protect the heater from rain and harsh weather; this can also help maintain the appearance.
Have your tools ready. To mount a heater, you will need:
- About two sets of spanners for grabbing and tightening.
- A screwdriver for screwing nuts.
- A drill for making holes on the wall.
- A mounting bracket is a metal bracket on which something is mounted, in this case, the heater.
Installation
Step 1: Decide where you want to position the heater. It is best to consider the location where your client, guests, or family will enjoy the heat. If you have a television or a projector, mount it above or opposite since it’s the general focal point of the room.
Step 2: Using a stud finder, locate the wall studs. Once you find a suitable spot for the holes, mark them with markers or taps to avoid forgetting the position.
STEP 3: Mark and drill your holes. The holes will allow the mounting screws to enter the wall.
Step 4: Attach the mounting bracket to the wall. Hold your mount to the wall and drill the mounting screws into the holes you made in the previous step.
STEP 5: After securing the wall bracket to the position on the wall. Assemble the heater components by connecting the provided hose to the gas inlet. The gas inlet is located at the back of the heater, and the hose comes with the package unattached to avoid breaking and causing gas leakages.
STEP 6: With two properly adjusted spanners, grab the root of the gas inlet with one hand and, with the other, firmly tighten the gas inlet. You can also use any other tool of your choosing to grab, like a plier or clamp.
STEP 7: Check for gas leaks. Connect a compressed air line at half psi. Test the hose for leak detection spray or soapy water by spraying the liquid at the connection joint. Usually, a line of bubbles indicates the presence of leaks. So, if lines of bubbles are formed, it means there’s a leakage; therefore, tighten the screw and retest until there are no indications of heat. It is essential to ensure that there are no leaks because of the risk of explosion.
Step 8: Next, pass the wiring harness and the hose through to the top of the mouthing brackets. Then, use the supplied bolts and washers to fasten the mounting arm onto the heater correctly.
Step 9: Using the spanner, tighten the four connecting bolts properly. Make sure it’s stationed appropriately.
Step 10: Attach the heater assembly to the wall bracket. Make sure that the gas hose and wiring harness slide through the groove of the heater. Then position the heater and the hose and make sure the hose nut aligns with the valve fitting. The threads should be engaged correctly before tightening the assembly.
Step 11: Position the mounting arm and insert the pivot bolt, followed by the flat and spring washers. Then insert through the mounting bracket and screw gently with your hand to properly fit the hole, then tighten. There are about five openings on the bracket; select your designed angel, insert the mounting screw and tighten with a screwdriver.
Step 12: Connect the Honeywell unit. It is connected within the wall bracket. The Honeywell unit functions as the heater controller, just like a thermostat controls the furnace. To connect it, locate the white ionization probe wire. Properly plug it into the larger opening furthest from you. Then find the black ignition probe wire, properly plug it into the smallest spade closest to you, which leaves you with the green earth wire, which can be plugged into the available spades at the top of the unit. The usage of needle nose pliers are recommended for making the spades more accessible.
Step 13: Now connect the gas supply to the unit, then with a spanner, tighten the fitting correctly.
Step 14: Remove the protective covering from the Smart – Heat unit. To test the pressure, unscrew the outlet pressure test point, lure the two, and attach a digital manometer used to test pressure.
Step 15: Now plug the unit into a power outlet and turn it on. Make sure the gas valve is open on the LPG for gas models. The heater tile should begin to glow evenly.
Step 16: Next, adjust the regulator. Unscrew and remove the regulator cover with a flat-mouthed screwdriver twist to adjust the pressure by turning the regulator clockwise to increase the pressure and anti-clockwise to reduce the pressure. The pressure must be set to the appropriate gas type according to your region’s specific pressure requirements. You can check the product manual for instructions.
Step 17: Turn off the unit, replace the cover and remove the manometer hose. Replace the test point screw and restart the heater; allow it to run for about 10 to 15 minutes to ensure that it is functioning correctly.
Step 18: Conduct a lake test of gas fittings, including a retest of the fitting of the rear of the heater from the access plug.
Step 19:
- Finally, switch off the heater.
- Replace the wall bracket cover.
- Fix it with eight screws.
Tungsten Smart-Heat Portable Heater
Things to Know Before Beginning Installation

When installing the Tungsten Smart-Heat portable heater, it is essential to pay attention to the fundamental instructions below.
The heater should only be used in above-ground open-air settings, with:
- Natural ventilation,
- Flat smooth surface, and,
- Rapid dispersion of gas leakage and products of combustion by wind and natural convection.
The Tungsten Smart-Heat Portable heater comes with the contents packed in 2 boxes.
Box 1 contains:
- Head Assembly (the actual heater), and
- AAA Battery.
Box 2 contains:
- Base Assembly,
- Front Assembly,
- 2 Rear Arm Assembly,
- 2 Side Panels,
- 2 Side Panels,
- 2 Top Arms,
- Rear cover,
- Top Flames and
- Deflector and Regulator.
Installation
Step 1: Unpack the boxes and place all items on a flat smooth surface.
Step 2: Using the supplied 2 x M8 20mm screws and the M8 Hex Key, attach the rear arms to the base assembly and screw tightly.
Step 3: Now, place the front assembly against the two openings on the base assembly and screw both sides.
Step 4: Gently move the rear arms close to the front assembly; screw them to it with the M8 x 16mm screws, using the Hex Key.
Step 5: Secure the side panels to the frame, and with a Philip screwdriver, screw them together on both sides using the 12 x G8 screws.
Step 6: Slide the upper arms over the connectors on the front assembly. Make sure the top screw holes are facing inward. Secure the front panel to the upper arms using 4 x M5 screws.
Step 7: Secure the upper arms to the lower arm connectors and tighten using 2 x m8 x40 screws and the Hex Key. The stand is ready.
Step 8: Gently lay the heater stand and the heater head on a flat smooth surface.
Step 9: Slide the gas hose through the arm slot and push it all the way down to the bottom arm.
Step 10: Attach the heater head to arms, tighten using the washers and 4 x m8 screws.
Step 11: Now return the heater to the upright position.
Step 12: There is a hole at the center of the base. Fill the bottom with grain sand through the hole.
Step 13: Connect the regulator assembly to the gas cylinder and screw.
Step 14: Place the gas cylinder in the lower housing and fasten the strap securely
Step 15: Pull back the sleeve on the regulator connector, insert the hose fitting and loosen the sleeve on the regulator connector.
Step 16: Lower the gas cylinder bracket into position.
Step 17: Secure the deflector to the heater by loosening the two screws and securing the brackets underneath the washers. Use a screwdriver to tighten the screws back into their original position.
Step 18: Next, unscrew the igniter cap. Insert the AAA battery into the cab and screw it back to its original position.
Step 19: Now test for gas leakages. To test for gas leakages:
- Turn on the gas supply.
- Apply a soapy water solution to the gas cylinder valve, the hose connection, and the other end of the hose connection on the heater head. Soap bubbles indicate sighs of leakages.
- If a gas leak is detected, turn off the gas supply. Tighten any leakage fittings and repeat the test until no gas leak is detected.
Step 20: Using a screwdriver, attach the top piece of the rear cover to the frame using the 4 x G8 screws provided. Magnets secure the lower portion of the rear cover. First, position the slots in the back cover over the two hooks and lower the cover to allow the magnets to meet.
Platinum and Tungsten Smart-Heat Electric
Installation MUST be carried out by a qualified and licensed electrician only. The heater should be inspected before use and annually serviced and inspected by a qualified and licensed service person only.
Troubleshooting Bromic Heaters
Below are some possible problems that could be found in your Bromic heater and how to fix them. This section is divided into gas and electric models.
Troubleshooting Gas Models: Platinum and Tungsten Smart-Heat

Problem 1 – Leaping Flames From the Unit
If flames are leaping from the unit or if the heater tiles are glowing dull, or a cloudy discharge is coming out from the heater, there are mainly two significant reasons that are most likely to be responsible for it.
First, the heater’s pressure might be sitting incorrectly and can cause frames to leap from the unit. To fix that:
- Remove the cover of the control box, test the sufficiency of the inlet pressure. To test the pressure, connect a manometer to the inlet pressure test point and make sure it’s tightly fixed, so it does not fall off.
- Turn on the manometer and check for readings. The appropriate reading should be 50 millibars, so anything higher or lower is unacceptable, and a site manager or a professional should be contacted for further investigation.
- Next, replace the test point screw and attach the manometer to the outlet pressure test point below the inlet.
- Remove the regulator adjustment cover, then start up the unit to let the gas valve open.
- Now adjust the pressure with a flat mouther screw by turning the regulator clockwise to increase the pressure and anti-clockwise to decrease the pressure.
- The pressure should be set for the specific gas type according to your region’s specific pressure requirements provided in the instruction manual supplied with the heater.
- Finally, turn off the unit and return the regulator cover. The heater should run properly now, but if not, then a trained professional should be consulted.
Problem 2 – Dull or Cloudy Burning of Tile Fractures
Incorrect installation of the injectors in the unit causes cloudy or dull burning of tile fractures. To verify, the heater must be unmounted and removed from the wall for proper investigation.
- First, turn off the unit. Then disconnect the flexible hose from the gas valve.
- Gently disconnect the earth, ionization, and ignition cables.
- Undo the pivot bolt and gently remove the unit from the wall.
- Undo all four mounting screws and disconnect the wall bracket.
- Loosen and remove the flexible hose with spanners.
- Behind the heater, four screws are securing the base plate. Undo them and move the base plate.
- Carefully slide the wiring harness through the backplate of the heater.
- Loosen and remove the four manifold mounting screws and remove the manifold.
- Observe closely to check the size marked on the injector. Don’t hesitate to contact the dealer to replace the injectors; if the size marked on the injectors is not the same as the size indicated on your compliance plate on the back of the heater for unit and gas type.
Problem 3 – Popped Out Tiles or Illuminated Tile Fractures
If a fraction of the tile is preset, the obvious symptom will include the illumination of fractures and, in some cases, result in the tiles going out and not burning at all or pop out altogether. If you notice any of these symptoms, the spare parts need to be replaced; please contact the dealer or a trained professional.
Problem 4 – Flicking or Gurgling Combustion Sound
Switch off the heater for 5 seconds, and then restart. If the sound continues after restarting severally, then the burners are damaged. And it is advised that you consult the dealer for repair or replacement.
Problem 5 – Unit Tiles and Uneven Burning
Blocked systems can often cause uneven burning without any sign of physical damage. The heating system must be flushed with compressed air to clear out potential blockages to do that:
- First, switch off the heater.
- Locate the gas valve outlet in the gas area.
- Insert the hose of the compressed air, make sure the hose is fitted correctly.
- Eject compressed air (maximum of 20 psi of) down the inlet fittings. The compressed air inside the gas valve will flush out any minor blockages within the manifold or the injectors.
- Reconnect the gas hose, and then conduct a leak test with the procedure stated above in the installation section of this article.
- Now restart the heater.
Note: You can find the outlined procedure for your specific heater in your instruction manual’s maintenance and servicing section.
If, after following the above procedure, and significant uneven burning or unlit tiles are still present. Your dealer or a professional should be contacted.
Troubleshooting Tungsten Smart-Heat Portable Heater
Problem 1 – Burners Not Staying ON or Not Lighting at All
If your burners are having difficulties with lighting, there are a few possible causes:
- The gas valve may be off;
- Tank near empty;
- The fuel tank may be empty;
- The hose or other openings might the clogged;
- There might be a loosed connection;
- Low gas pressure;
- A bad thermocouple; or,
- The heater is not in the correct position.
To fix that:
- First, check if the gas valve is turned off; if it is, then turns it back on
- · If the gas valve is turned on, then check all fittings for loose connections and tighten them if you found any.
- · If the burners are still not lighting, replace the gas cylinder with a new one.
Please contact your dealer or a trained professional if the above solutions did not help.
Problem 2 – Low Burner Flame
Low burner flames can often occur if the supply hose is bent or twisted. To fix that, straighten the hose and perform a leak test on it.
Problem 3 – Uneven Emitter Glows
This can happen if the gas pressure is low or the base is not on a leveled surface. To fix this problem:
- Replace the gas cylinder with a new one.
- If the base is not on a leveled surface, then move the heater to one.
Problem 4 – Thick Black Smoke
Blockages in the burner can cause thick black smoke discharge from your heater. To fix this problem, turn off the heater and let it cool off, then turn it back on. If it continues, contact your dealer or a trained professional to remove blockages and clean burners.
Problem 5 – Carbon Deposit
If the reflector or flame grid is dirty, this will cause carbon deposits. To solve this problem, clean the reflector and flames screen.
Troubleshooting Electric Models: Platinum and Tungsten Smart-Heat
In general, all-electric Bromic heaters need a trained professional for troubleshooting. But, there are some minor problems which you can handle on your own. Below are solutions to some of these problems.
Platinum Smart-Heat Electric
Problem 1 – No Heating
Improper connections could sometimes prevent your heater from function correctly, therefore unable to provide heat, and to fix that;
- Check the connection to the power supply – Properly examine the power supply of your heater from the appliance to the source.
- If any fault is found, contact your dealer or a trained professional.
Problem 2 – Not Enough Heat
If your heater is not producing enough heat, there are two possible reasons. First, the appliance might be too small for your patio or space.
- Get an additional heater for proper coverage.
- When getting an extra heater, it is recommended that you know the dimensions of your patio or space.
- Contact the dealer to verify what size you need to get.
Second, the heater might be mounted too high or too far from the area.
- Decrease the mounting height or distance.
Problem 3 – Too Much Heat
If your heater produces too much heat, than it’s supposed to. In that case, the heater may be too large for the patio or area. Consider replacing with a smaller heater.
Second, the heater may have been mounted too low or too close. If that is the case, increase the mounting height or distance.
Tungsten Smart-Heat Electric
Problem 1 – Element Does Not Energize
When your heater does not energize, it is likely that the elements are defective or have an improper connection. Check the connections to the power outlet. If no fault is found, then the elements need to be replaced. You may contact your dealer or a trained professional to replace them.
Problem 2 – Hot Spot in Tube
A hot spot in the tube is often caused by the heater not being appropriately leveled or grease or moisture on the tube. To fix, adjust the heater to mount level. If the previous solution does not work, clean or replace the tube.
Problem 3 – Not Enough Heat
If the heater is mounted too high or too far from the area, or if the heater is too small, it often causes the heater to supply only a tiny amount of heat. Here is how to troubleshoot this problem:
- First, correctly measure the dimensions of your area to verify the heater is appropriate for the space.
- If it is not, then decrease the mounting height and distance of the heater.
- If your site is too big, it is advised to get additional heaters according to the dimensions of your space.
Problem 4 – Too Much Heat
When the heater is too large for application or the heater is mounted too low or too close.
- Increase the mounting height or distance
FAQs (Frequently Asked Questions)
Question: How do I choose the right bromic heater?
Answer: It is always best to inquire from your dealer or a trained professional.
Question: Is Bromic heater a brand?
Answer: Yes, Bromic Heater is a brand.
Question: What is a Tungsten?
Answer: Tungsten is a name of a particular heater model in the bromic outdoor product line. Although the word ‘tungsten’ is a name of a chemical element on the periodic table.
Question: Where are Bromic Heaters made?
Answer: Sydney, Australia
Question: Is Bromic a good brand?
Answer: Yes, it is. Because it is a visually attractive design that distributes heat evenly and well.
Question: Can I use any of the Bromic Heater models indoors?
Answer: Some Bromic Heater can be used indoors, but it is recommended that you confirm from your dealer for safety reasons.
Conclusion
Bromic Heating has put in a significant effort in the outdoor heating industry over the years. The brand has designed heaters literally for almost every single outdoor heating situation there is. The above article covers various topics on Bromic heaters such as the pros and cons of the various models, installation, troubleshooting, and servicing.
Sources:
- MERV 8 vs MERV 13 Explained: Which Should You Use and Why? - December 9, 2023
- Inducer Motor Guide: Warning Signs, Troubleshooting and Replacing - December 9, 2023
- Best HVAC Mold Inhibiter Solutions - November 22, 2022